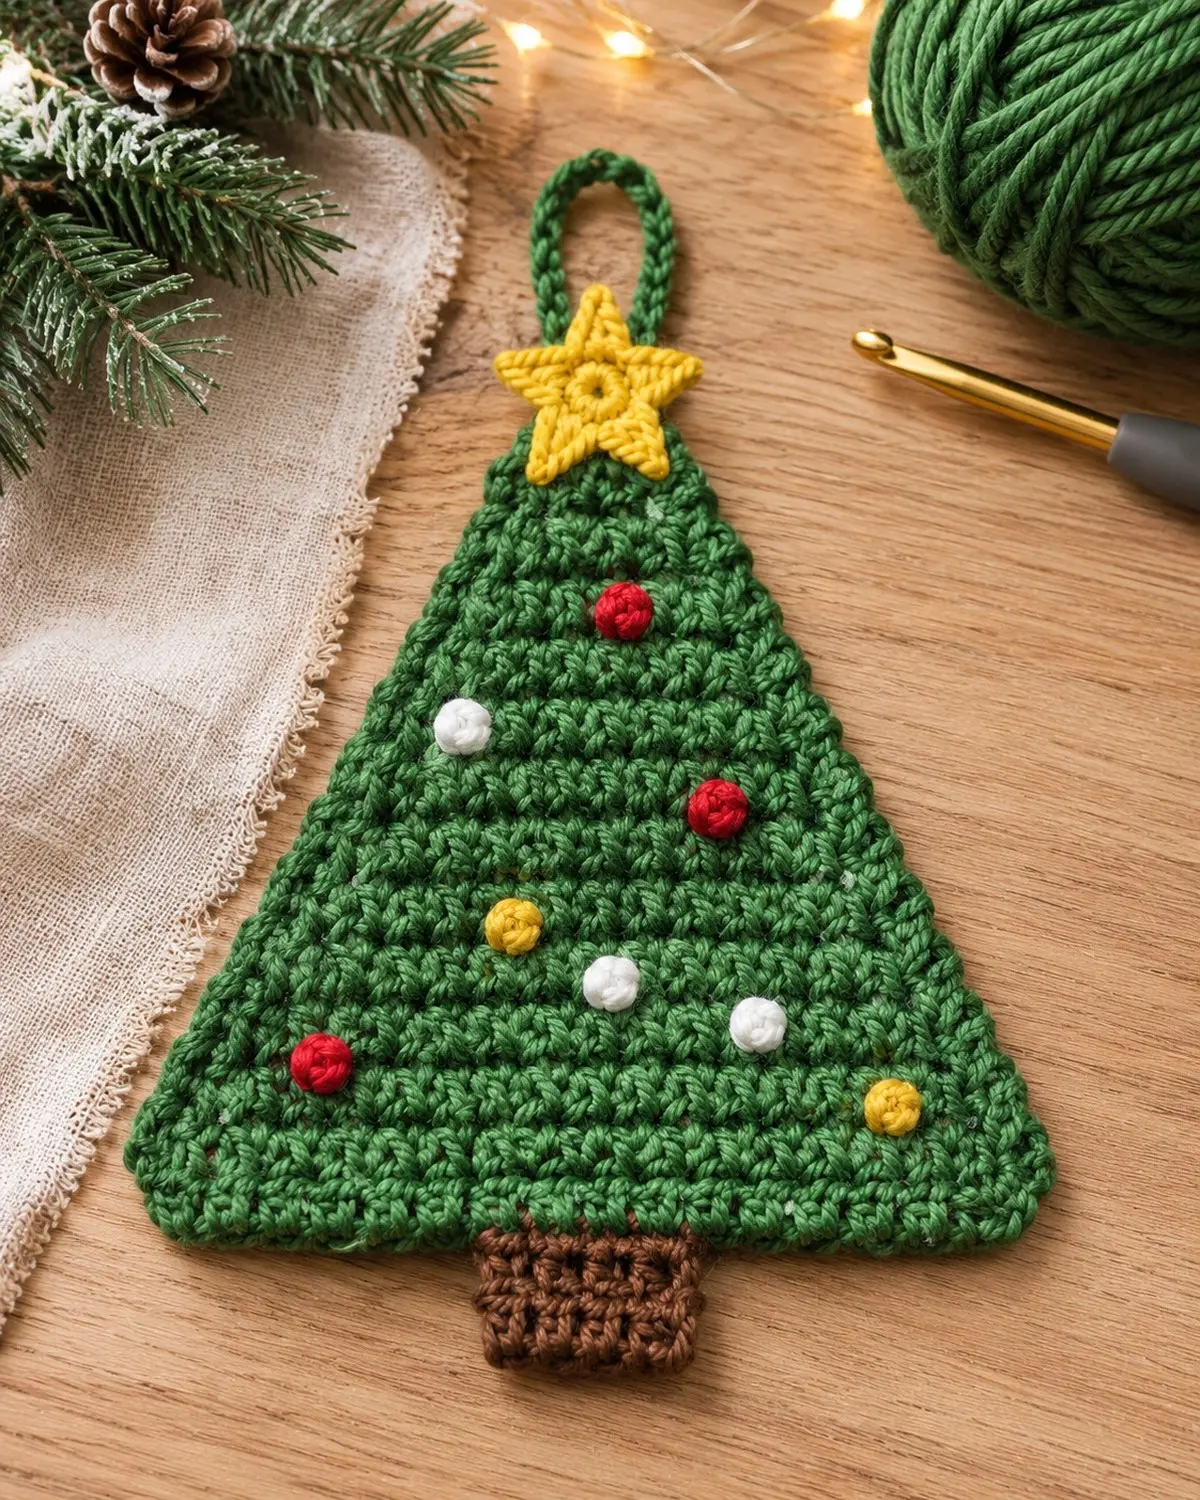
This crochet Christmas tree ornament pattern is the one I reach for when I want a handmade decoration finished before the kettle has properly cooled. It’s a flat little tree worked in plain single crochet, shaped with a decrease every other row, then finished with a neat border, a tiny trunk and a five-point star.
If you can chain, single crochet and work two stitches together, you can make it. It’s also a brilliant way to use up the green, brown and yellow scraps hiding at the bottom of your yarn basket.
In this post
Pattern at a glance
- Skill levelEasy / beginner
- Finished sizeAbout 4 × 4.4 in (10.5 × 11 cm)
- TimeAbout 30–45 minutes
- YarnWorsted weight (#4)
- Hook4.5 mm (US 7)
- TermsUS crochet terms
Free printable pattern
Prefer to crochet from paper? The printable PDF has every row with stitch counts, the border, trunk, star and finishing steps, plus the stitch chart, on 3 pages.
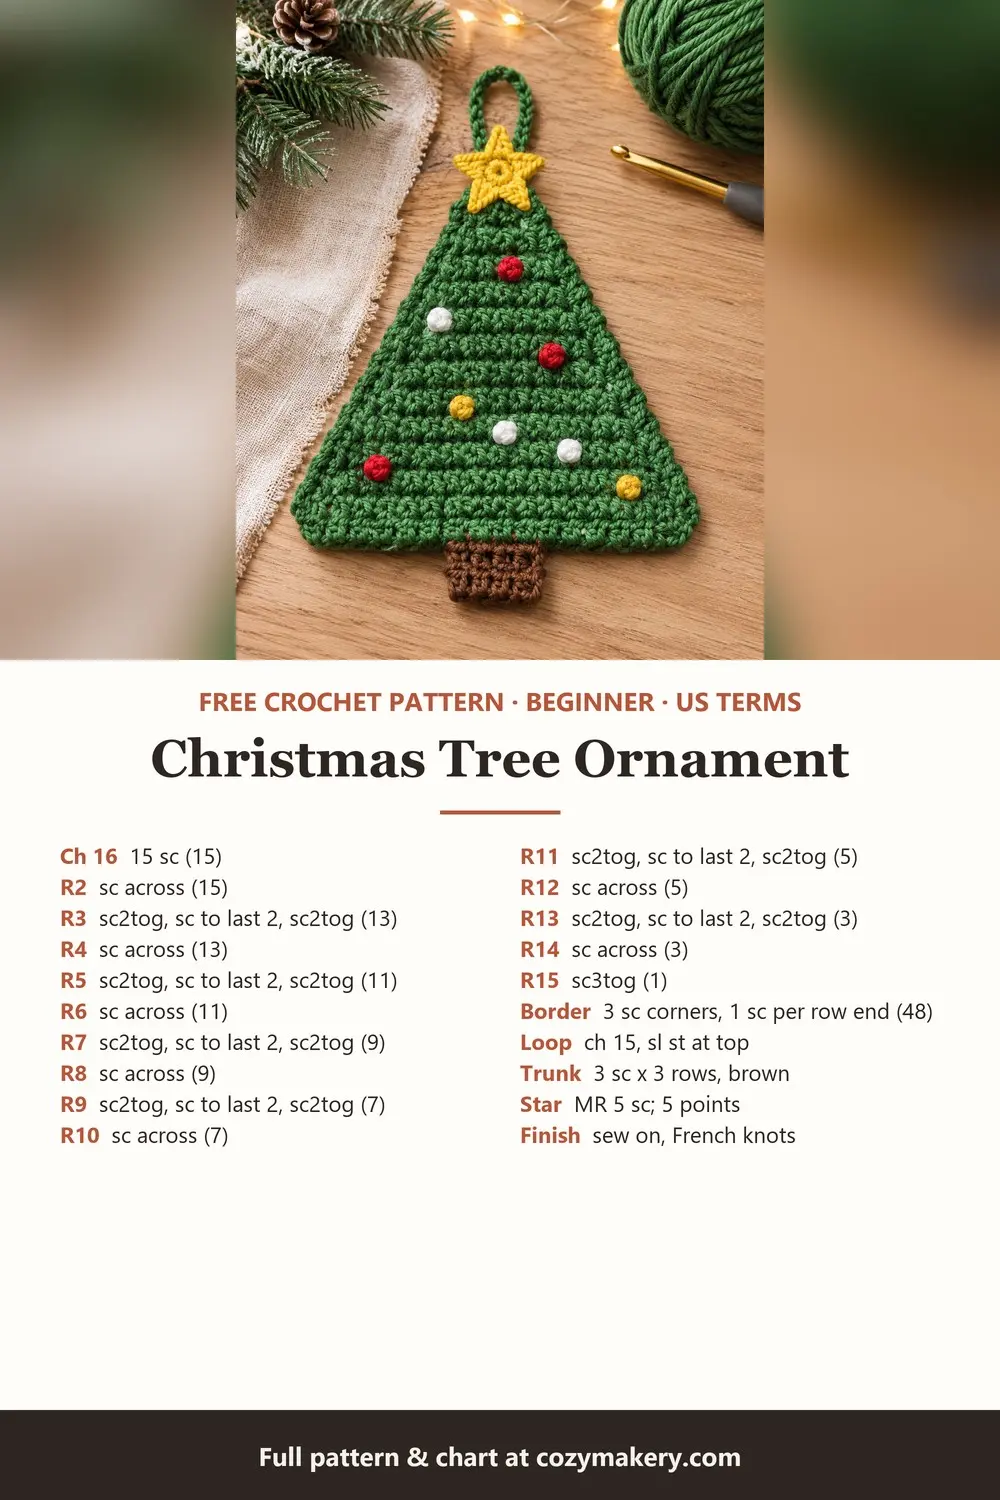
Why you’ll like this little tree
- Only one main stitch. The whole tree is single crochet, plus a decrease at each end of every other row.
- Easy to keep on track. Every row ends with a stitch count, and there’s a full chart further down.
- Scrap friendly. The tree takes roughly 10 yards of green. The trunk and star need less than 2 yards each.
- Three sizes from one pattern. Change the starting chain and the same steps give you a smaller or larger tree.
Materials
- Green worsted weight yarn: about 10 yd (9 m)
- Brown worsted weight yarn: about 1.5 yd (1.3 m) for the trunk
- Yellow or gold worsted weight yarn: about 1.5 yd (1.3 m) for the star
- Small scraps in red, white and gold (yarn or embroidery floss) for the French knot baubles, optional
- 4.5 mm (US 7) crochet hook
- Tapestry needle and scissors
I’d use a smooth acrylic or cotton for your first one. Fuzzy or sparkly yarns look lovely on the tree but make the stitches hard to see while you count. If you’re not sure what “worsted” means on your yarn label, the Craft Yarn Council’s yarn weight chart is a handy reference; look for the number 4.
Abbreviations (US terms)
| US | Meaning | UK equivalent |
|---|---|---|
| ch | chain | ch |
| sc | single crochet | dc (double crochet) |
| sc2tog | single crochet 2 stitches together (1 decrease) | dc2tog |
| sc3tog | single crochet 3 stitches together (2 decreases) | dc3tog |
| sl st | slip stitch | ss |
| st(s) | stitch(es) | st(s) |
How to sc2tog: insert your hook in the next stitch, yarn over and pull up a loop (2 loops on hook). Insert in the following stitch, yarn over and pull up a loop (3 loops on hook). Yarn over and pull through all 3 loops. An sc3tog works the same way across three stitches, so you finish with 4 loops on the hook before the final pull-through.
Gauge and size
Gauge isn’t critical for an ornament, but for reference, the sizes on this page assume about 16 sc and 18 rows to 4 in (10 cm). If you crochet tightly, your tree will simply come out a little smaller. Try to keep the same tension if you’re making a matching set.
Crochet Christmas tree ornament pattern
The tree is worked flat in rows, from the bottom up. The ch 1 at the start of each row is a turning chain and does not count as a stitch. The number in brackets is how many stitches you should have at the end of the row.
The tree (green)
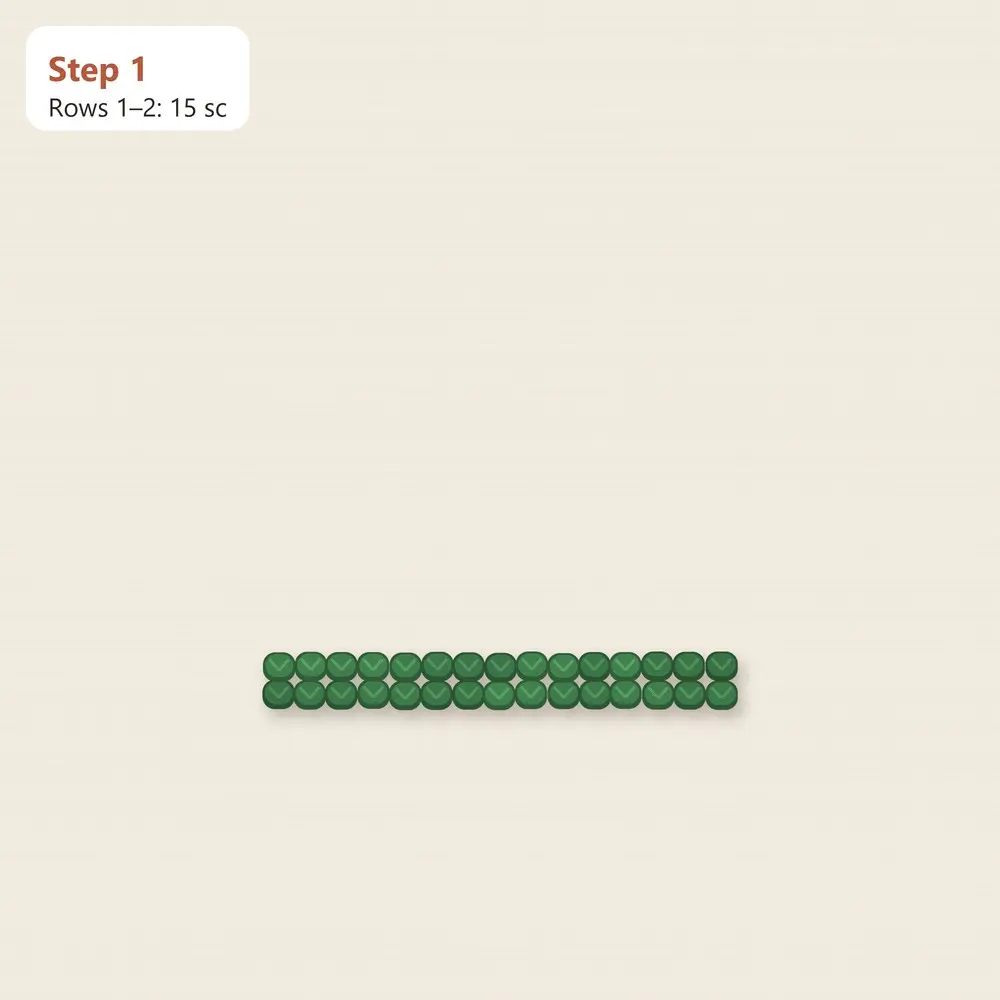
- Row 1: Ch 16. Sc in the 2nd ch from the hook and in each ch across. Turn. (15)
- Row 2: Ch 1, sc in each st across. Turn. (15)
- Row 3: Ch 1, sc2tog, sc in the next 11 sts, sc2tog. Turn. (13)
- Row 4: Ch 1, sc in each st across. Turn. (13)
- Row 5: Ch 1, sc2tog, sc in the next 9 sts, sc2tog. Turn. (11)
- Row 6: Ch 1, sc in each st across. Turn. (11)
- Row 7: Ch 1, sc2tog, sc in the next 7 sts, sc2tog. Turn. (9)
- Row 8: Ch 1, sc in each st across. Turn. (9)
- Row 9: Ch 1, sc2tog, sc in the next 5 sts, sc2tog. Turn. (7)
- Row 10: Ch 1, sc in each st across. Turn. (7)
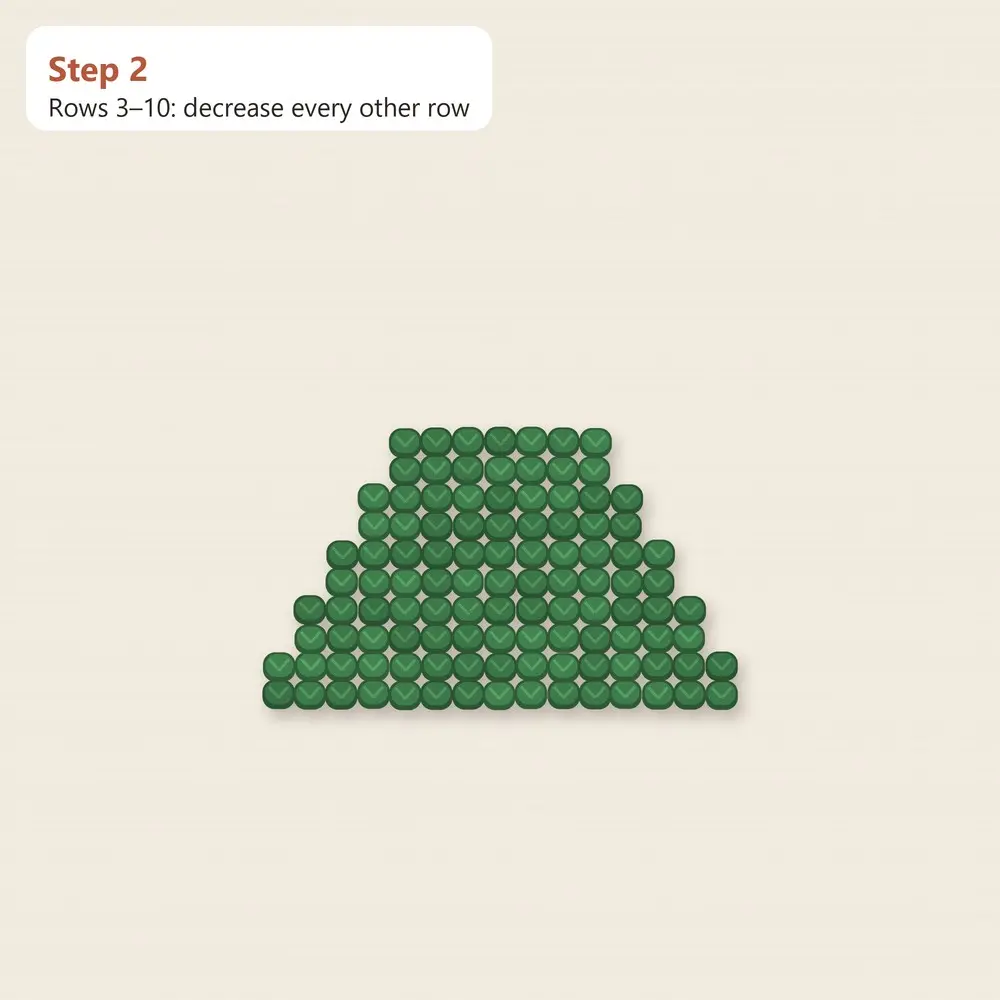
- Row 11: Ch 1, sc2tog, sc in the next 3 sts, sc2tog. Turn. (5)
- Row 12: Ch 1, sc in each st across. Turn. (5)
- Row 13: Ch 1, sc2tog, sc in the next st, sc2tog. Turn. (3)
- Row 14: Ch 1, sc in each st across. Turn. (3)
- Row 15: Ch 1, sc3tog. (1) Don’t fasten off; go straight into the border.
Notice the rhythm: an even row is always “sc in each st across”, and an odd row from Row 3 onwards always loses two stitches. Once that clicks, you barely need to look at the pattern.
Border round (green)
The border smooths out the stepped edges and turns the shape into a proper triangle. You’re now at the top point of the tree.
- Ch 1, work 3 sc in the top stitch.
- Working down the side, sc in the end of each row from Row 14 to Row 2 (13 sc).
- Work 3 sc in the first loop of the foundation chain (the corner).
- Sc in each of the next 13 foundation loops.
- Work 3 sc in the last foundation loop (the second corner).
- Working up the other side, sc in the end of each row from Row 2 to Row 14 (13 sc).
- Join with a sl st to the first sc. (48 sc in total)
Row ends can be a bit vague, so don’t worry about hitting the exact centre of each one. What matters is ending with 48 stitches; if you’re one off, add or skip a stitch along a side rather than at a corner.
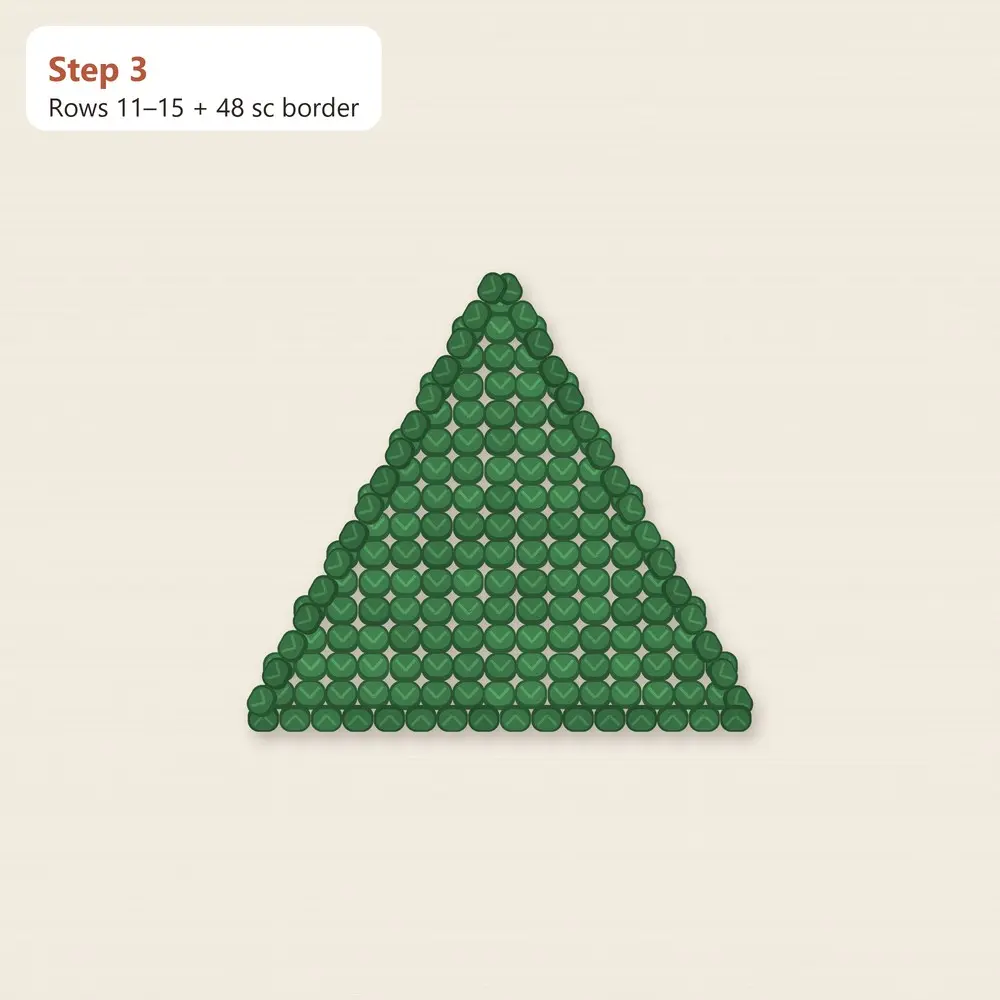
Hanging loop (green)
Sl st into the next sc, which is the middle stitch of the 3 sc at the top. Ch 15, then sl st into the same stitch to close the loop. Fasten off and weave in the ends.
Trunk (brown)
- Row 1: Ch 4. Sc in the 2nd ch from the hook and in the next 2 ch. Turn. (3)
- Rows 2–3: Ch 1, sc in each st across. Turn. (3)
Fasten off, leaving a 10 in (25 cm) tail for sewing.
Star (yellow)
- Round 1: Make a magic ring. Ch 1, work 5 sc into the ring, pull the ring closed and join with a sl st to the first sc. (5)
- Round 2: *Ch 3, sl st in the 2nd ch from the hook, sc in the next ch, sl st in the next sc of Round 1. Repeat from * 4 more times. (5 points)
Fasten off, leaving an 8 in (20 cm) tail for sewing.
Putting it together
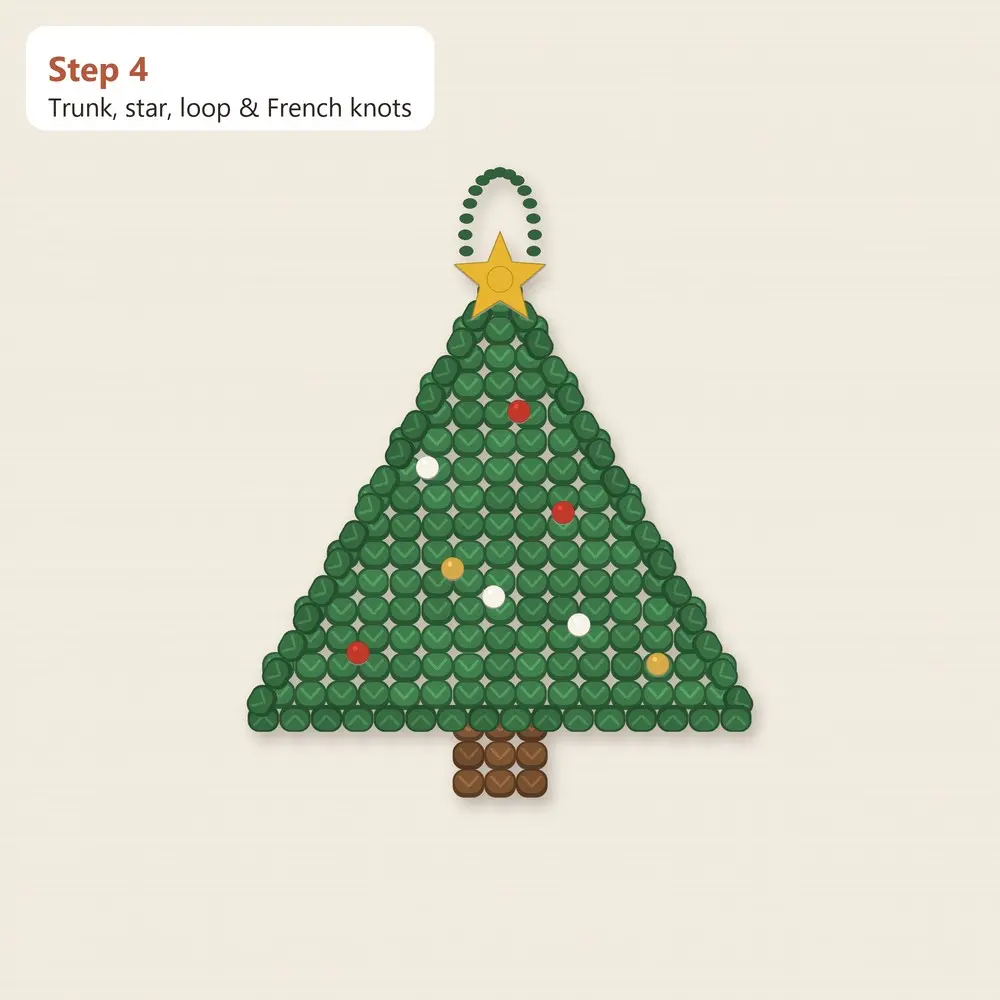
- Trunk: place the trunk behind the tree so about one row overlaps the bottom edge, centred under the middle of the tree. Whip stitch it to the back of the border and weave in the end.
- Star: sew the star over the top point so it covers the base of the hanging loop. A few stitches through the centre and two of the points are enough.
- Baubles (optional): with red, white and gold scraps, add 6–8 French knots across the front of the tree. Wrap the yarn twice around your needle for a nice round knot.
- Finish: weave in every end along the border on the back, then give the tree a gentle press with your fingers to flatten it.
Stitch chart
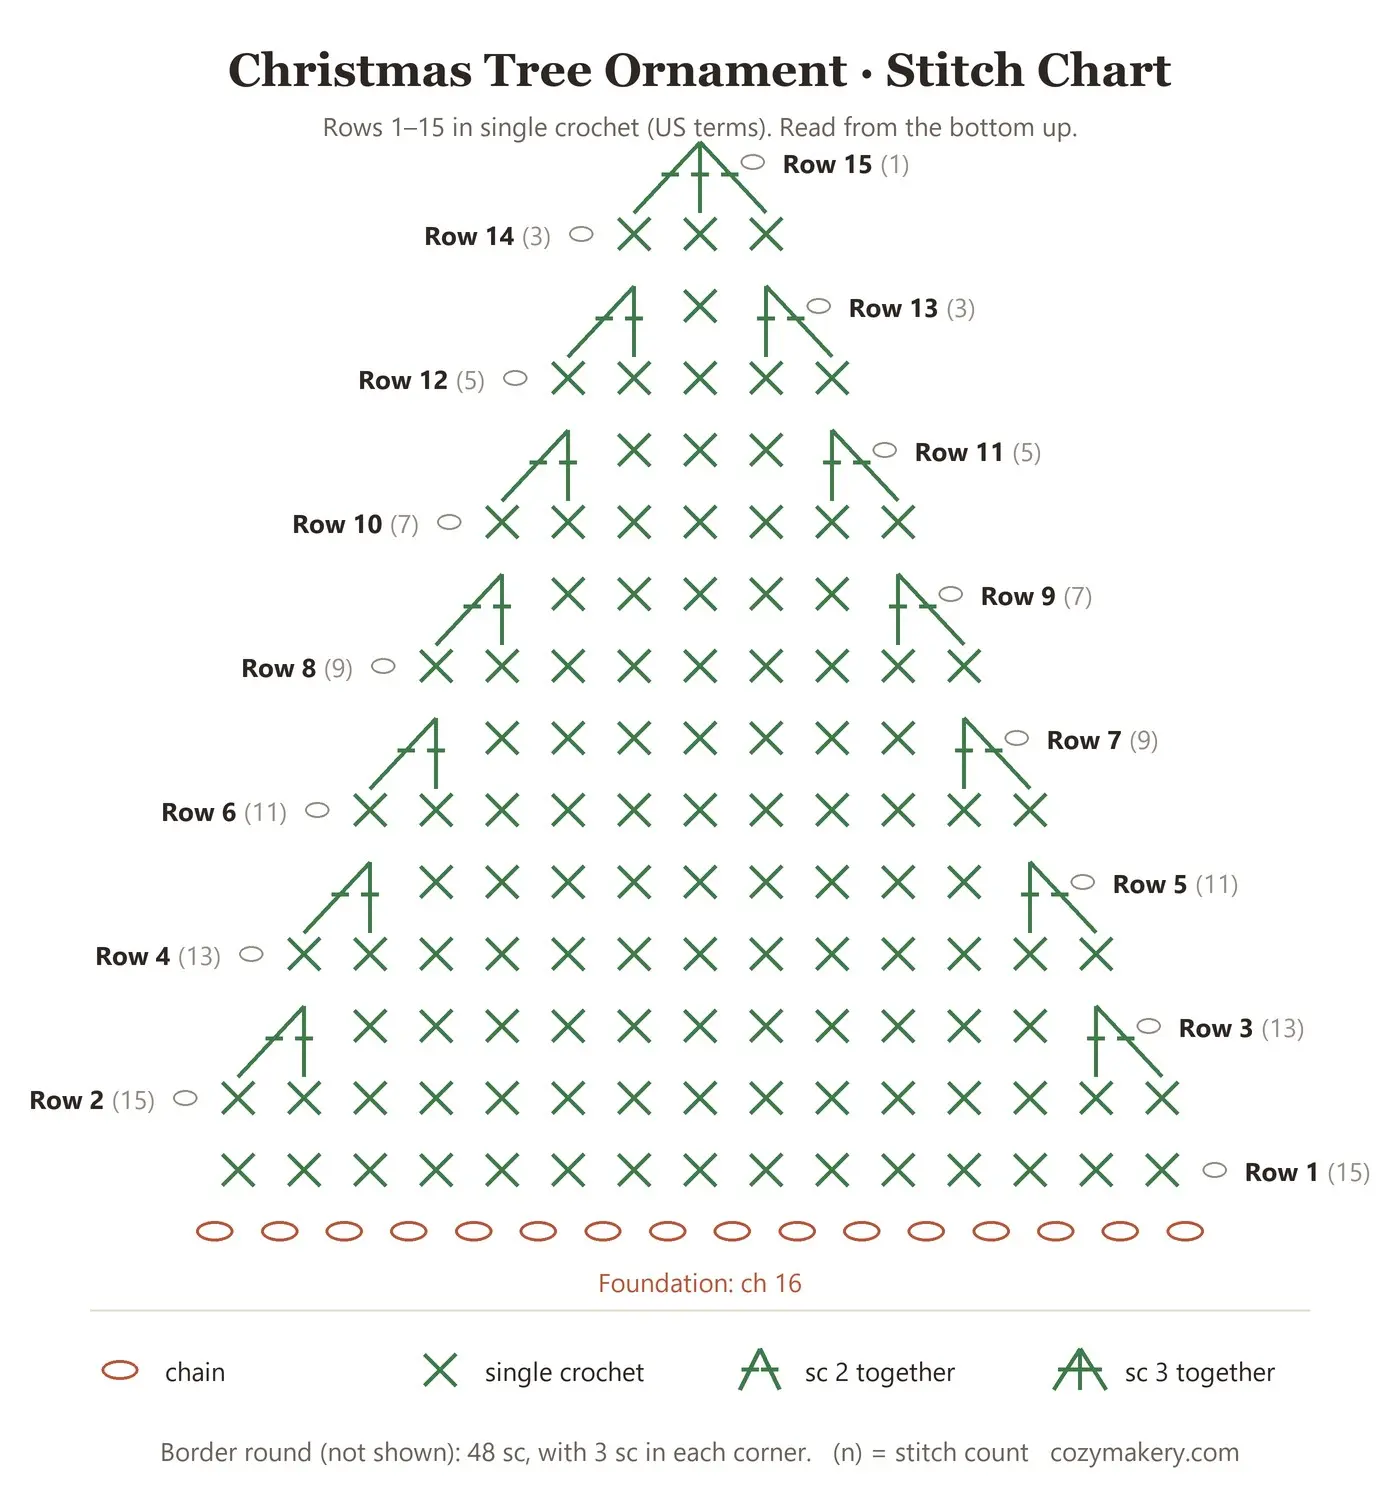
If you prefer charts, here’s the whole tree on one page. Start at the foundation chain at the bottom and read each row from the side with its row number, which is the side you start that row on if you crochet right-handed. Each × is one single crochet, and the joined symbols at the row ends are the sc2tog decreases.
Tips for neat edges
- Count every decrease row. It takes ten seconds and catches mistakes before they turn into a lopsided tree.
- Don’t skip the last stitch. The last stitch of a row likes to hide right under the turning chain. If your tree is shrinking faster than the pattern says, that’s usually why.
- Use a stitch marker in the first stitch of each row if you lose track easily.
- Keep the turning chain loose so the side edges don’t pull in.
- Tidy the trunk join by sewing through the back loops only, so nothing shows on the front.
Make it your own
A smaller or bigger tree
The pattern works with any even starting chain. Keep the same rhythm (a plain row, then a decrease row) until 3 stitches remain, work one plain row of 3, then finish with sc3tog.
| Size | Starting chain | Rows | Border | Approx. size |
|---|---|---|---|---|
| Small | Ch 12 (11 sc) | 11 | 36 sc | 3.1 × 3.5 in (8 × 9 cm) |
| Medium (this pattern) | Ch 16 (15 sc) | 15 | 48 sc | 4 × 4.4 in (10.5 × 11 cm) |
| Large | Ch 20 (19 sc) | 19 | 60 sc | 5.1 × 5.2 in (13 × 13.3 cm) |
For the border, work 3 sc in each corner and one sc in each row end and foundation loop in between. The counts above already include the corners.
Colour ideas
- Snowy tree: green body with a white border.
- Striped tree: change colour every two rows, at the start of a plain row so the joins hide in the side edges.
- Scandi style: cream tree, red border, red star.
- Gift topper: skip the loop and tie the tree straight onto a present with ribbon.
Frequently asked questions
How long does it take to crochet one tree?
The tree and border add up to 175 single crochet stitches. Most people can work that, plus the trunk, star and sewing, in 30 to 45 minutes. Your first one will be slower while you get used to the decreases.
Can I use a different yarn weight?
Yes. The stitch counts stay the same, only the size changes. DK yarn with a 3.5–4 mm hook gives a slightly smaller tree, and bulky yarn with a 6 mm hook gives a chunky one that works well as a gift tag.
Is this ornament safe for babies and toddlers?
Ornaments with hanging loops aren’t toys, so keep them out of reach of small children. If you’d like a version for little hands, leave off the loop, embroider the baubles firmly and check that the star and trunk are securely sewn on. Avoid adding beads or buttons.
How do I make the tree stiffer?
Single crochet is already quite firm. For a stiffer ornament, glue a felt triangle to the back, or brush on a little fabric stiffener and let it dry flat.
Save it for later
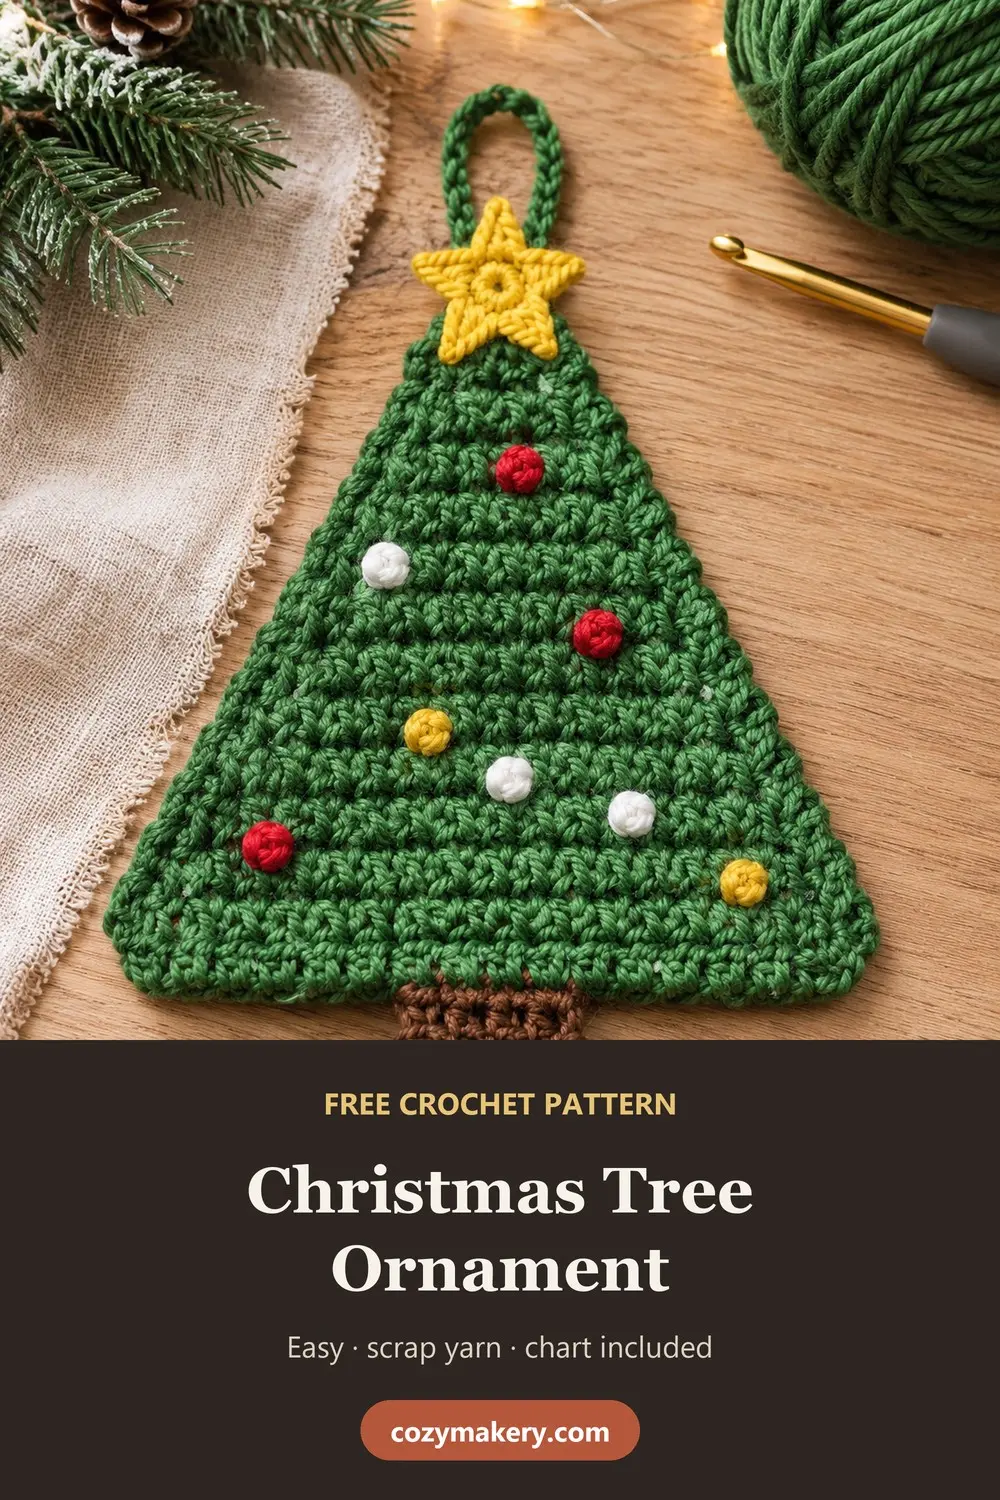
Pin the image below so the pattern is easy to find when the decorating mood strikes. If you make a tree, I’d genuinely love to see it. Send a photo to info@cozymakery.com, and if you spot anything in the pattern that doesn’t add up, tell me and I’ll fix it.
Want a tree that stands up? Try the crocheted cone Christmas trees in three sizes. Looking for more festive makes? Browse everything in Christmas Crafts learn the classic granny square, or start with the basics in Crochet. You can read how every pattern on this site is written and checked on the editorial policy page.